Adobe Lightroom is a popular application that is used by many people to do professional photo editing. Because now many photographers use smartphones to take photos, this application is becoming increasingly popular. Many professional photographers choose Adobe Lightroom to beautify their photos.
Are There Any Special Techniques For Using Adobe Lightroom?
Of course, various special techniques can be used to edit photos using Adobe Lightroom. Each editing technique in Adobe Lightroom uses different settings. Therefore, it all depends on the photos taken by the photographer.
Photo Editing Techniques In Adobe Lightroom
There are several techniques that you can use to edit photos in Adobe Lightroom:
- Selective Edit
The first is to use a premium feature from Adobe Lightroom called Selective Edit. By using this feature, you can balance some areas in the photo that appear overexposed. You can use the existing settings so that the photo of all parts of the photo becomes more balanced.
- Remove Objects
The second is to remove objects that seem to distract in the photo. You can take advantage of a special feature called the Healing Brush in Adobe Lightroom to remove or disguise objects that seem distracting. With the help of AI in Adobe Lightroom, everything can be done easily.
- Crop Part of Photo
The third is to crop part of the photo by using the Crop feature. If the photo you take looks less symmetrical or there are excessive parts, you can immediately crop it with the Crop feature in Adobe Lightroom. Make the cuts carefully so as not to spoil the whole photo.
- Rotate Photos
The fourth is to rotate the photo using the Geometry feature in Adobe Lightroom. Often we take photos that are too tilted so that they look less good when viewed. To overcome photos that are too tilted you can use the Geometry feature. Rotate your photo to the best angle using the Geometry feature.
- Eliminate Noise
The fifth is to remove noise in photos using the Noise Reduction feature. When we take photos with high ISO we often produce photos that have white spots. This is what is commonly referred to as noise. You can disguise white spots in photos by using the Noise Reduction feature so that your photos are not damaged.
- Sharpen Colors
The sixth is to sharpen the color of the photo by using the Saturation and Vibrance features. Often we take pictures that lack color due to dark places or too much light. Therefore, we can sharpen the color of the photo by using the Saturation and Vibrance features. That way your photos will look more alive and more colorful.
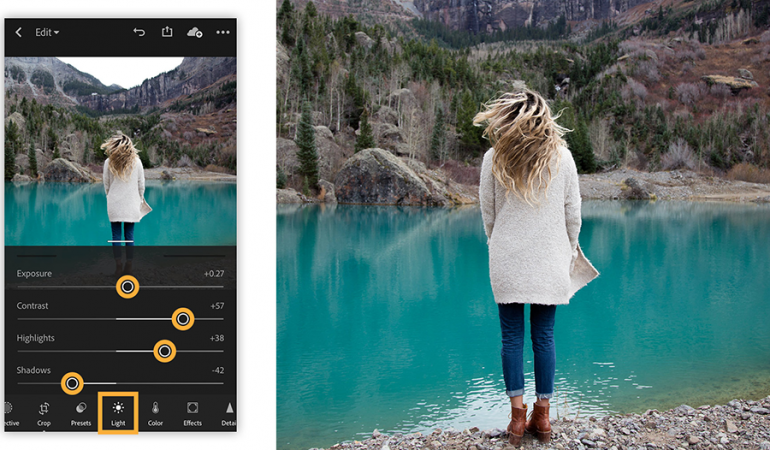
- Increase and Decrease Brightness
The seventh is to increase and decrease the brightness of the photo using the Lighting and Exposure features. Photos that are too bright sometimes disguise the objects in them. This also applies to photos that are too dark. To overcome this you can use the Lighting and Exposure features to change the brightness of the photo to the ideal level.
- Balancing Whites
The eighth is to balance the white that is in some parts of the photo. Sometimes there are parts of the photo that appear too white even though the lighting conditions are at ideal levels. To overcome the white color that is too excessive you can use a feature called White Balance.
Those are some techniques that you can use to do photo editing in Adobe Lightroom. Use these techniques according to the conditions of the photos you have taken. Editing photos using Adobe Lightroom can be said to be not too complicated, but you must remain careful in editing so that the results are of high quality.